Careers pagesBeginner guide
How to add a careers page to WordPress: a beginner's guide.
Add a careers page with job listings and a job application form to your WordPress site. No code, step by step, in about half an hour.
By The Vakanssi team7 min read6 steps
In this guide (6 steps)
- Before you start
- Step 1: Install the plugin
- Step 2: Answer the setup wizard
- Step 3: Post your first job
- Step 4: Look at your careers page
- Step 5: Test the application form
- Step 6: Find the application
- Getting your jobs on Google
- Keeping candidate data tidy
- Checklist before you share the link
- Frequently asked questions
This guide is for you if your business has a WordPress website and you want people to apply for jobs on it. You do not need any code or a developer.
By the end you will have a careers page with job listings that update themselves, a job application form that accepts a CV, and one place in WordPress where every application arrives. Plan on about half an hour, most of it spent writing your first job ad.
We use Vakanssi, a free plugin (an add-on for your WordPress site) that we make.
Before you start
Sign in to wp-admin, your site's private dashboard, usually at yoursite.com/wp-admin. You need an Administrator account; if Plugins is missing from the left menu, ask whoever runs the site. Your site needs WordPress 6.6 or newer and PHP 7.4 or newer (check under Tools, then Site Health, then Info; your host can update either).
- Your jobyou publish it
- Careers pagelists it
- Apply formname, email, CV
- Applicationsin wp-admin
Step 1 of 6:Install the plugin
- In the left menu, click Plugins, then Add Plugin (Add New Plugin on WordPress 6.6 and 6.7).
- In the search box at the top right, type Vakanssi.
- On the Vakanssi card, click Install Now, then Activate.
A Hiring item appears in the left menu, and a short setup wizard opens. If it does not, click Hiring, then Setup.
Step 2 of 6:Answer the setup wizard
The wizard takes about three minutes, and you can change every answer later. Three screens need your input:
- Company: type your company name. Candidate emails come from this name.
- Careers page: choose Create a new page, titled "Careers" unless you change it. If you already have a careers page, connect that one instead.
- Emails: check the sender address candidates see, ideally one on your own domain so mail does not land in spam. Then enter the address that gets an alert for each new application.
The Finish screen says whether visitors can reach your careers page from your home page, and offers a way to add it to your menu if not. If it shows a Fix it link next to Protect candidate files, follow it before you go live. The setup wizard docs cover every screen.
Click Post a job to continue.
Step 3 of 6:Post your first job
Later, you reach this screen from Hiring, then Add New Job.
- At the top, type the job title, for example "Office manager".
- Below it, write the description: what the job involves, who you are looking for, and something about your team. Vakanssi needs at least 30 characters, and Google prefers real detail.
- Optional: pick a team in the Departments panel on the right, so visitors can filter by team.
Below the description, the Job details box has three tabs:
- Workplace & location: choose on-site, hybrid or remote, then the city and country. For a remote job, list the countries people may apply from.
- Compensation: pay is hidden unless you choose to show it.
- Employment & application: tick the employment type, such as full-time. A closing date is optional.
Click Publish at the top right, then Publish again to confirm. The job is now on your careers page, with its own page and an application form. More in Creating and publishing a job.
Step 4 of 6:Look at your careers page
Click Pages in the left menu, hover over Careers, and click View.
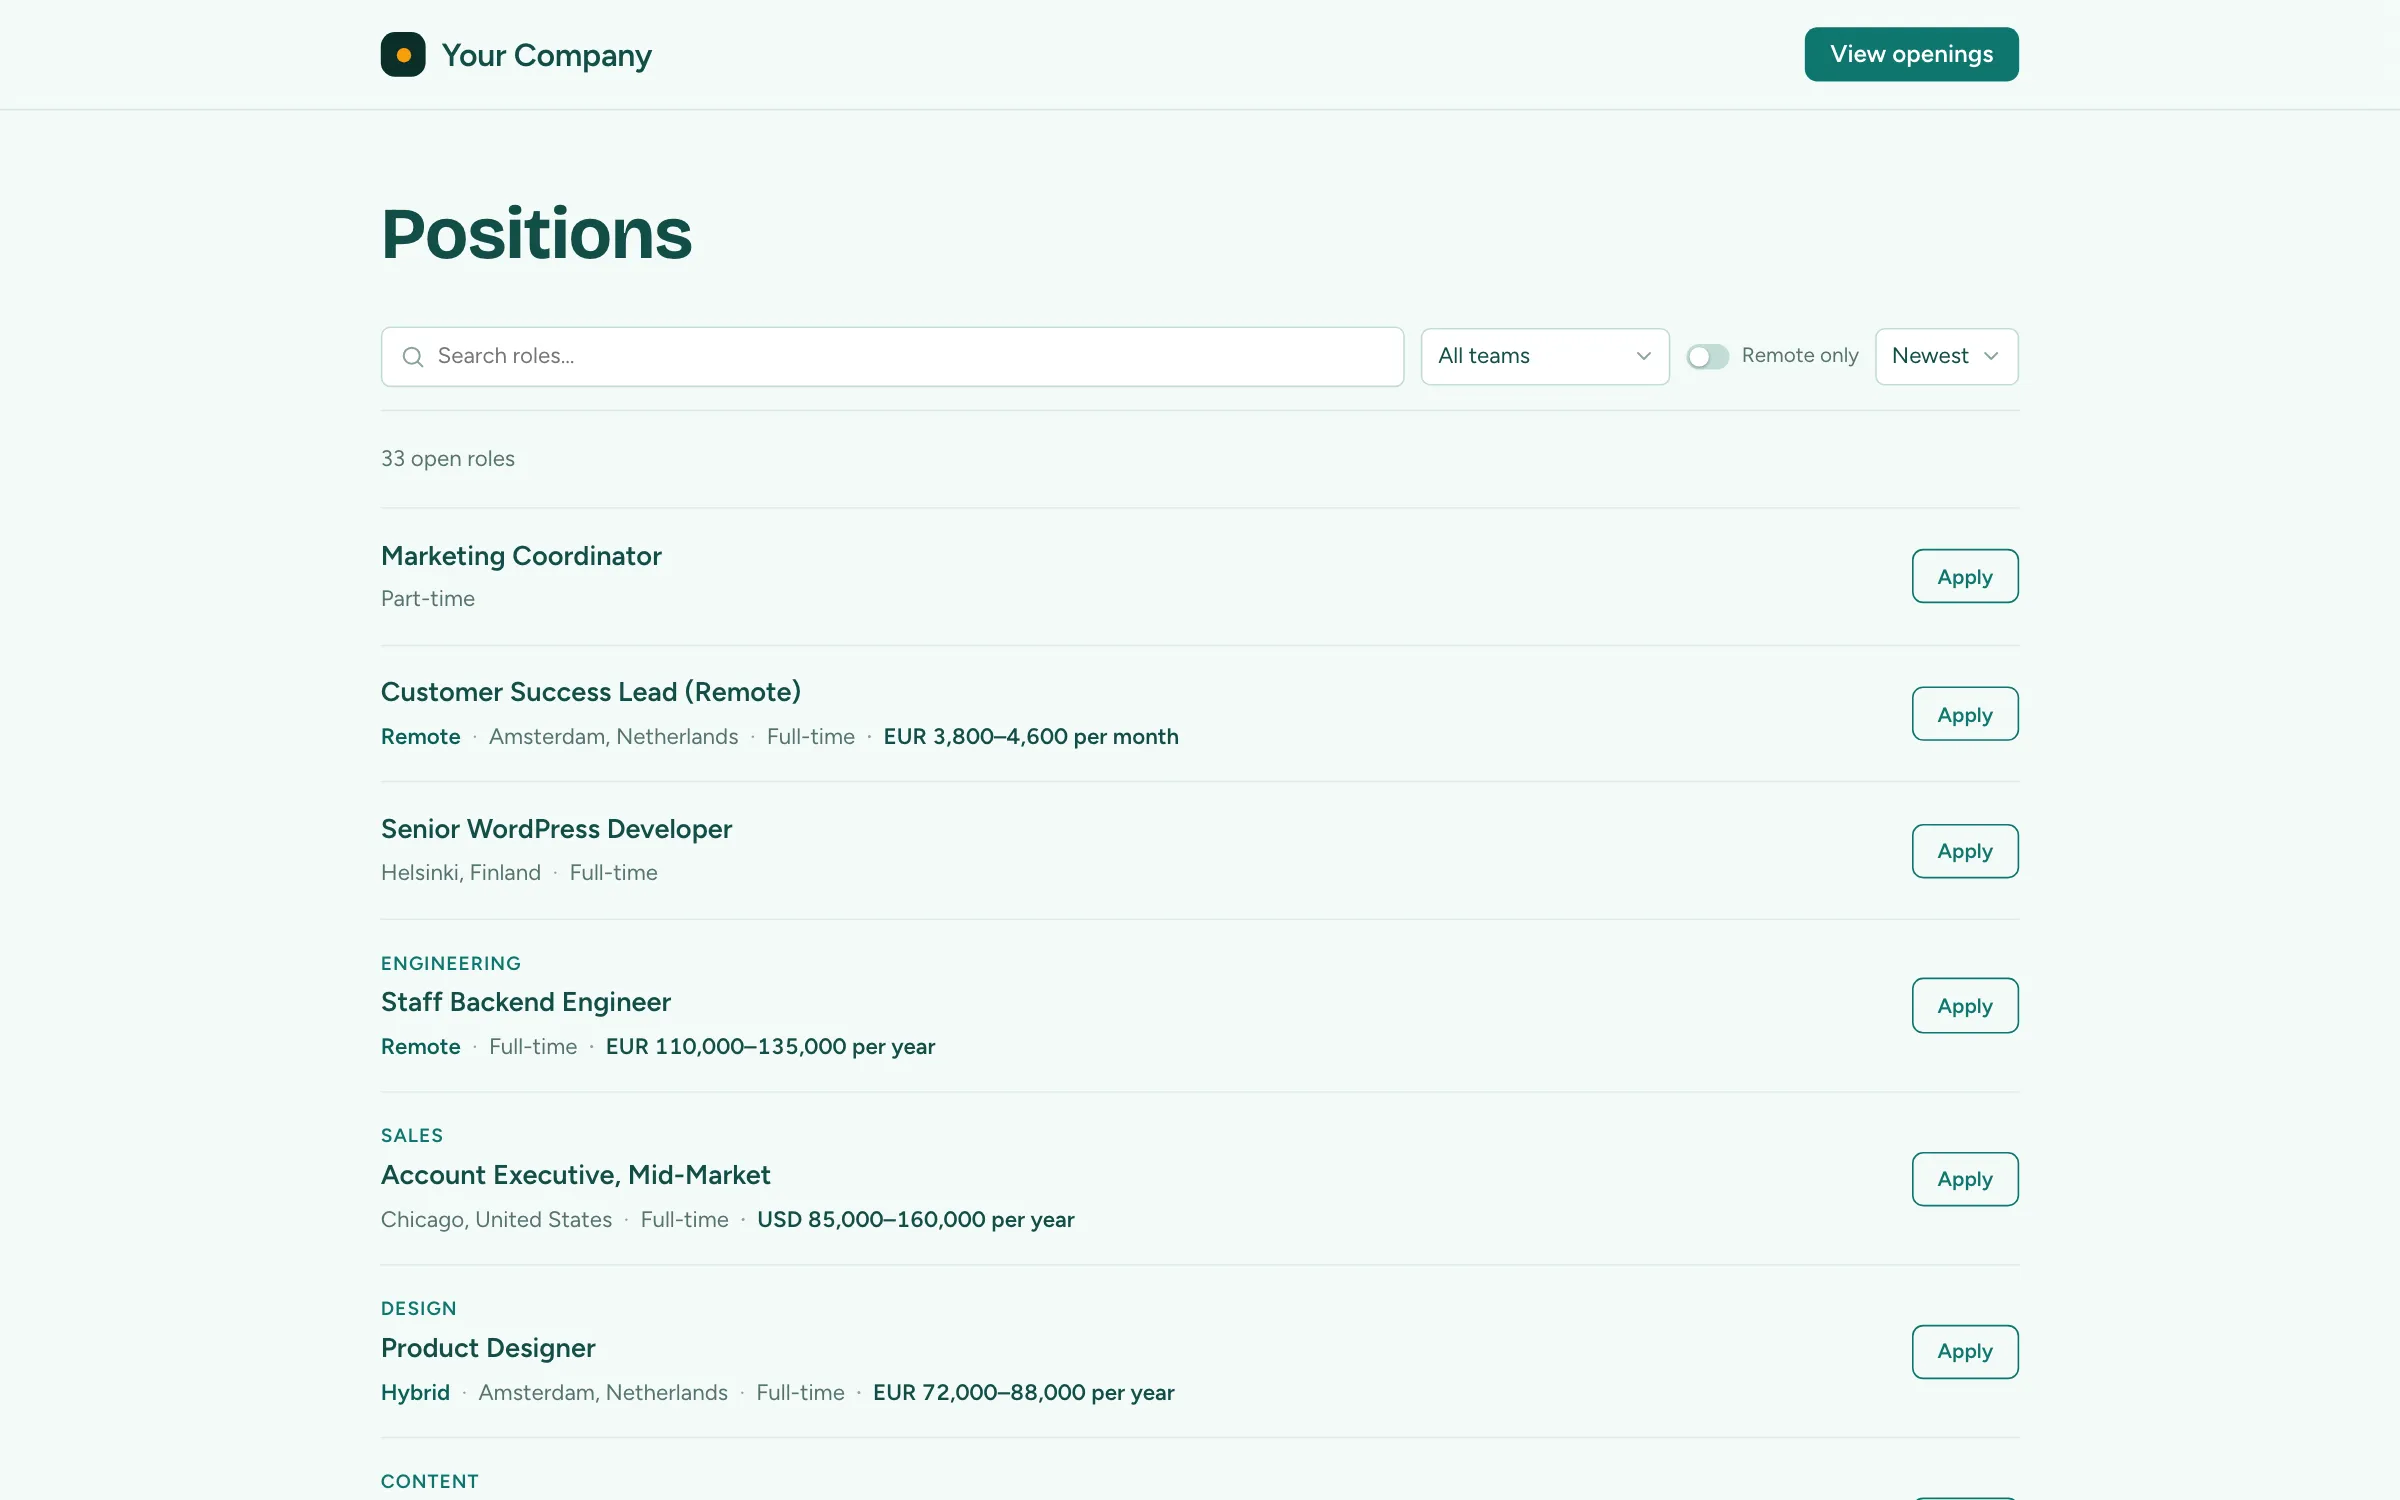
The page uses your theme's header and footer, so it looks like the rest of your site. New jobs appear when you publish them, and jobs past their closing date drop off by themselves. Visitors can search the list, filter by team and show remote jobs only.
 View full size
The wizard put the list on the page for you.
In the block editor (WordPress's default editor, where a page is built from pieces called blocks) it is a Job Listings block. In the older classic editor it is a shortcode, a tag in square brackets: [vakanssi_jobs].
Add your own text and photos around it, but leave it in place. See Your careers page to show jobs on other pages too.
Step 5 of 6:Test the application form
Every job page ends with an application form. Candidates enter their name, email address and CV (PDF or Word, up to 5 MB by default), and tick a required consent box. They do not create an account, and after they click Submit they see a confirmation on the same page.
You do not need to set up spam protection. Vakanssi already runs checks against bots that real candidates never notice, such as a hidden field only bots fill in. If spam still gets through, the free plugin can add Cloudflare Turnstile, an extra check that tells people from bots. See Receiving applications.
Step 6 of 6:Find the application
After your test, three things happen:
- You get a confirmation email as the candidate.
- The alert address from the wizard gets an email with a link to the application.
- The application appears under Hiring, then Applications.
Click Hiring, then Applications. Pipeline view shows a board with one column per stage (a step in your hiring, such as Interview or Offer). Drag a card to move a candidate on, and click it to open their details and CV.
CVs do not go into your Media Library (where WordPress keeps your images and files, open to anyone with a link). They stay in a locked folder on your own server, and only signed-in team members with permission can download them.
Once you have seen it, delete the test: open it and click Delete in the candidate's panel. More in Working with applications.
Getting your jobs on Google
Google for Jobs is the panel of openings Google shows when someone searches for a role. Vakanssi adds the hidden job information Google reads (called structured data) to each job page for you. A Google for Jobs readiness banner in the job editor says Eligible, or names what is missing, such as a location.
Eligible does not mean listed: Google decides when to show a job, which can take days or weeks. To check a live job, paste its address into Google's Rich Results Test. See Google for Jobs.
Keeping candidate data tidy
Vakanssi clears out old applications by itself. By default, after 24 months it anonymises each one: it deletes the CV and anything that identifies the person, and keeps only the job, stage and dates for your numbers.
You can change the period under Hiring, then Settings, then General. If someone asks for their data or asks you to delete it, use Tools, then Export Personal Data or Erase Personal Data.
State your retention period in your privacy policy. This is not legal advice: check your own legal duties. See Privacy & GDPR.
Checklist before you share the link
- Your careers page is live and in your site's menu.
- At least one job is published, with a real description and a location.
- That job's readiness banner says Eligible.
- You applied with a test CV, found it under Hiring, then Applications, and deleted it.
- Your privacy policy page is published and says how long you keep applications.
Then share your careers page link wherever you announce jobs.
Haven't installed it yet? Get Vakanssi free from WordPress.org and start with step 1.
Frequently asked questions
Do I need a developer?
No. Everything here is clicks and typing in wp-admin with an Administrator account. If your WordPress or PHP is too old, your hosting company can update it. See Requirements & installation.
Does it work with my theme?
Yes, themes need nothing special. Sites built with Elementor or Divi also get a Vakanssi Jobs element. See Elementor, Divi, and block themes.
Where do the CVs go?
To a locked folder on your own server, not your Media Library or an outside service.
Is it really free?
Yes. Everything in this guide uses the free plugin from WordPress.org, and it stays free and fully working.